Navigating the device
|
The user can either edit the map or move the device and/or view the camera.
Both are not possible at the same time.
To edit the map, tap the icon |
Tap the icon ![]() to show the movement-controls.
to show the movement-controls.
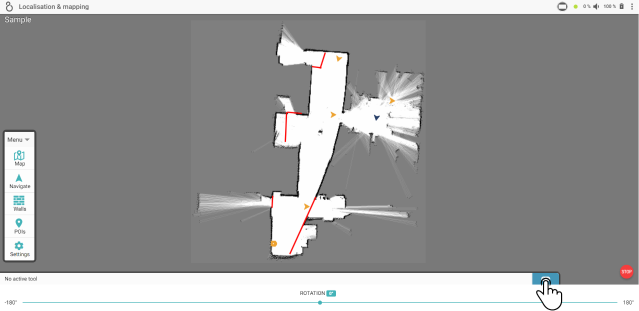
Tapping this option will show added controls and options for viewing the map and navigating the device. However, editing the map and using POIs to move the device will no longer be possible.
Tap the icon ![]() to return to editing the map.
to return to editing the map.
Controls for manually moving the device
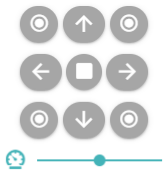
Additional controls will be shown for moving the device and tilting the head of the device. The movement-controls will only be shown if the map is shown, while the head-controls will only be shown if the camera-controls are active.

Tap the icon ![]() to switch between analog and digital controls for moving the device or the head.
to switch between analog and digital controls for moving the device or the head.
| Analog | Digital |
|---|---|

|
|
For more information on using the movement-controls, see the chapter movement controls on the steering-page.
Toggle additional views
At the bottom of the app, controls are shown to toggle other views.
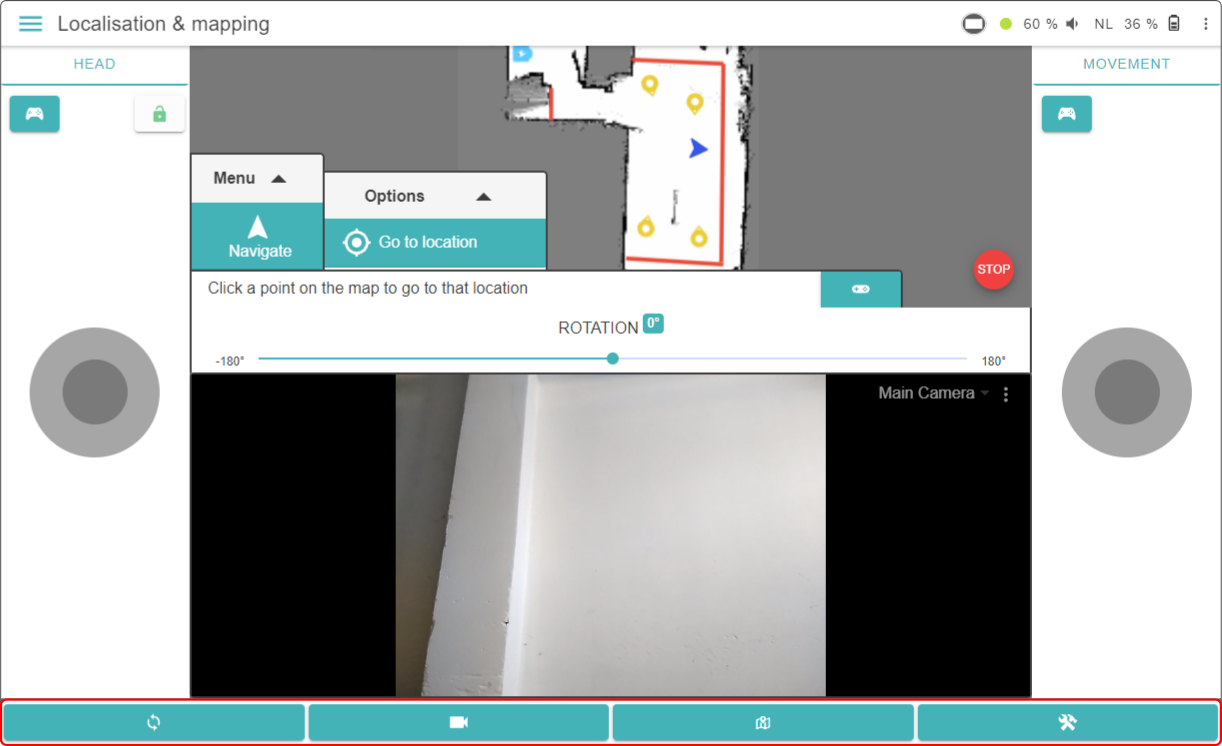
The buttons contain the following actions:
|
Tap this button to return to the editing-mode and hide all movement- and camera-controls from this page. |
|
Tap this button to toggle the camera and head-motion controls. |
|
Tap this button to toggle the map and movement-controls. |
|
Tap this button to rotate the positions of the camera- and map-screen. |


|
Controls for automatically moving the device
| If a route to the destination cannot be calculated from the current position of the device (e.g. walls are blocking the route, a passageway is too narrow) on the map, the device will not move. |
Other than manually moving the device, the automatic navigation system can also move the device to specified points on the map. There are 2 main methods for this:
-
Go to a POI
-
Go to a location on the map
Go to a POI
There are several ways of moving the device to a specified POI, specifically:
-
Use the voice-command on the device 'Go to <name of the POI>' (e.g. 'Go to Kitchen').
-
Tap the POI in the designated folder of the Kiosk.
-
Use the List of POIs in ZBOS Control to move the device to the POI. (1)
-
Use the Localisation and mapping-page in ZBOS Control to move the device to the POI.
(1): See the chapter POI for more information.
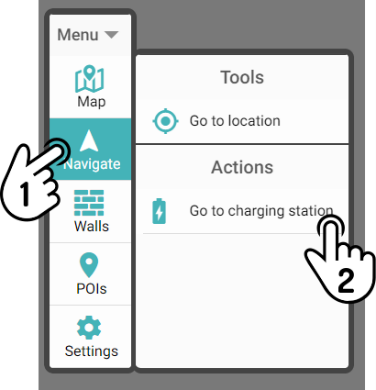
Go to charging station
The charging station is a special case amongst POIs. The voice-command Go to charging station will make the device move to the closest charging station, regardless of the name of the POI.
Therefore, special commands have been provided in ZBOS Control as well.
| The options for moving James to a POI also apply to the charging station. |
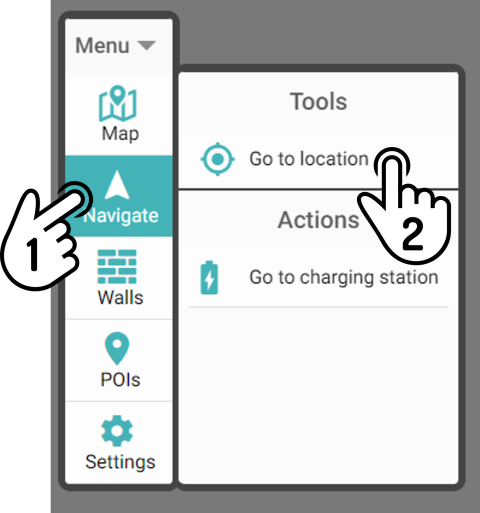
Tap the option Go to charging station in the menu Navigate to move the device to the nearest available charging station.

Go to a location on the map
Other than constantly defining POIs for the device to move to, James can also move to any point on the map without needing to define it as a Point-of-Interest.
Tap the option Go to location in the menu Navigate to start the navigation.
Tap anywhere on the map to make James (try to) move there.
| This option cannot be used to dock a device to the charging station. Use the option Go to charging station in the menu Navigate instead. |
| If no route can be calculated (due to incomplete maps, detected obstacles or walls), James will not move. |