Creating a webpage with buttons that trigger actions on the robot via the Webhook feature
Introduction
Webhooks allow your ZBOS device to receive real-time triggers from other services, such as gateways, social media platforms, other no-code tools and more. In this tutorial, we’ll show you how to make a a custom HTML page that triggers webhooks to make your ZBOS device do things.
Prerequisites
Before you begin, you’ll need the following:
-
Basic understanding of HTML and JavaScript
-
ZBOS Control linked to a ZBOS device of choice (RAIL >= 2.8)
-
One or more webhooks defined via the webhook UI in ZBOS Control
Example 1: Simple webhook
The most basic example is a simple webhook. First we need a HTML button:
<button id="button1">Simple webhook trigger</button>And some javascript to trigger it (don’t forget to change the action1 url):
const action1 = "https://api.talemate.co/api/v1/webhooks/CHANGETHIS_1/trigger";


// Simple example of a webhook with empty payload.
const button1 = document.getElementById("button1");
button1.addEventListener("click", function () {
fetch(action1, { method: "POST" })
  .then(response => {
    console.log("Action 1 triggered on device");
  })
  .catch(error => {
    console.error("Error triggering action 1 on device:", error);
  });
});
You can now use this button to trigger Task Manager entries or inside Composer with the "Wait for webhook" block.
Example 2: Simple webhook with payload
A more advanced example sends custom data with the webhook.
First we need another HTML button:
<button id="button2">Webhook trigger with payload</button>And here is some javascript to trigger it, notice the application/json content-type, and the data being passed on. Again, don’t forget to change the action2 url:
const action2 = "https://api.talemate.co/api/v1/webhooks/CHANGETHIS_2/trigger";


// Example of webhook that passes on data.
const button2 = document.getElementById("button2");
button2.addEventListener("click", function () {
const data = JSON.stringify({"message": "Hello World"});

fetch(action2, {
      method: "POST",
      headers: {
        "Content-Type": "application/json"
      },
      body: data
  })
  .then(response => {
    console.log("Action 2 triggered on device");
  })
  .catch(error => {
    console.error("Error triggering action 2 on device:", error);
  });
});
Just like in the previous example you can use this directly in the Task Manager or Composer.
To access the "message" we included in the payload, use variable {wait_webhook.message}
Example 3: Secure webhook
While the previous examples work fine, anyone that can "guess" the webhook URL can potentially trigger your webhooks. To make this safer, we also support using secure webhooks (in the advanced section of our Webhook UI).
<button id="button3">Webhook trigger with secret</button>For simplicity, we use the crypto-js library to handle the secret hash creation. Add the following to the document header:
<script src="https://cdnjs.cloudflare.com/ajax/libs/crypto-js/4.1.1/crypto-js.min.js" integrity="sha512-E8QSvWZ0eCLGk4km3hxSsNmGWbLtSCSUcewDQPQWZF6pEU8GlT8a5fF32wOl1i8ftdMhssTrF/OhyGWwonTcXA==" crossorigin="anonymous" referrerpolicy="no-referrer"></script>The hashed secret needs to be passed in the X-webhook-signature header.
Don’t forget to change the action 3 URL and the secret in the code below:
const action3 = "https://api.talemate.co/api/v1/webhooks/CHANGETHIS_3/trigger";

// Example of webhook using encoded secret.
const button3 = document.getElementById("button3");
button3.addEventListener("click", function () {
	const secret = "_secret_of_20_chars_";


	function getHashedSecret(data, secret) {
	  return CryptoJS.HmacSHA256(data, secret);
	}

	fetch(action3, {
	  method: "POST",
	  headers: {
	    "X-webhook-signature": getHashedSecret('', secret).toString()
	  },
	})
	.then(response => {
	  console.log("Action 3 triggered on device");
	})
	.catch(error => {
	  console.error("Error triggering action 3 on device:", error);
	});

});
Putting it all together.
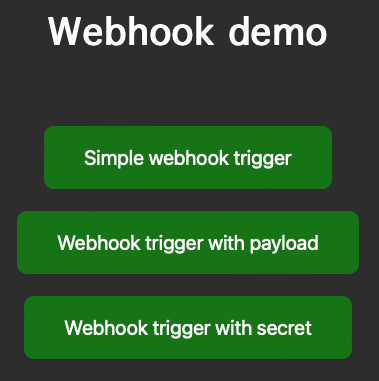
The examples above illustrate how easy it is to trigger webhooks from a custom webpage. The code below combines all this into a single page with styling:
<!DOCTYPE html>
<html>
  <head>
    <meta charset="UTF-8">
    <meta name="viewport" content="width=device-width, initial-scale=1.0">
    <meta http-equiv="X-UA-Compatible" content="ie=edge">
    <title>Webhook demo</title>

    <!-- Crypto-JS library for button3 secret -->
    <script src="https://cdnjs.cloudflare.com/ajax/libs/crypto-js/4.1.1/crypto-js.min.js" integrity="sha512-E8QSvWZ0eCLGk4km3hxSsNmGWbLtSCSUcewDQPQWZF6pEU8GlT8a5fF32wOl1i8ftdMhssTrF/OhyGWwonTcXA==" crossorigin="anonymous" referrerpolicy="no-referrer"></script>

    <style>
      body {
        background-color: #333;
        color: #fff;
        font-family: "Geneva", "Arial", "Verdana", sans-serif;
      }

      .container {
        display: flex;
        flex-direction: column;
        align-items: center;
        margin-top: 50px;
      }

      h1 {
        font-size: 36px;
        margin-bottom: 50px;
      }

      button {
        padding: 20px 40px;
        background-color: green;
        color: white;
        border: none;
        border-radius: 10px;
        font-size: 20px;
        cursor: pointer;
        margin-top: 20px;
      }
    </style>
  </head>
  <body>
    <div class="container">
      <h1>Webhook demo</h1>
      <button id="button1">Simple webhook trigger</button>
      <button id="button2">Webhook trigger with payload</button>
      <button id="button3">Webhook trigger with secret</button>
    </div>

    <script>
      const action1 = "https://api.talemate.co/api/v1/webhooks/CHANGETHIS_1/trigger";
      const action2 = "https://api.talemate.co/api/v1/webhooks/CHANGETHIS_2/trigger";
      const action3 = "https://api.talemate.co/api/v1/webhooks/CHANGETHIS_3/trigger";

      // Simple example of a webhook with empty payload.
      const button1 = document.getElementById("button1");
      button1.addEventListener("click", function () {
        fetch(action1, { method: "POST" })
          .then(response => {
            console.log("Action 1 triggered on device");
          })
          .catch(error => {
            console.error("Error triggering action 1 on device:", error);
          });
      });

      // Example of webhook that passes on data.
      const button2 = document.getElementById("button2");
      button2.addEventListener("click", function () {
        const data = JSON.stringify({"message": "Hello World"});

        fetch(action2, {
              method: "POST",
              headers: {
                "Content-Type": "application/json"
              },
              body: data
          })
          .then(response => {
            console.log("Action 2 triggered on device");
          })
          .catch(error => {
            console.error("Error triggering action 2 on device:", error);
          });
      });

      // Example of webhook using encoded secret.
      const button3 = document.getElementById("button3");
      button3.addEventListener("click", function () {
        const secret = "_secret_of_20_chars_";


        function getHashedSecret(data, secret) {
          return CryptoJS.HmacSHA256(data, secret);
        }

        fetch(action3, {
          method: "POST",
          headers: {
            "X-webhook-signature": getHashedSecret('', secret).toString()
          },
        })
        .then(response => {
          console.log("Action 3 triggered on device");
        })
        .catch(error => {
          console.error("Error triggering action 3 on device:", error);
        });

      });
    </script>
  </body>
</html>